Saturday, November 9, 2013

Pear Butter Recipe


There are pear trees from the same property that we have all our apple trees. Chet had picked pears a couple weeks ago and I had them sitting on our counter for a while. I didn't know what to do with all of them and was about to throw them away when I got the idea I can make pear butter. It's very similar to making apple butter. 
So I started the lovely process of making pear butter and got a recipe from a family friend. I peeled and skinned 20 small pears, cut them up in quarter slices, cut out the core and seeds and let them cook in a big pot with a little bit of water. I cooked them for about 20 minutes until they were like moosh. Then I put them in my Ninja blender and blended until very smooth with no clumps. I put the pear sauce back in the pan and cooked them on low with 1/2 cup oranje juice, a little bit of nutmeg, 1 tsp cinnamon and three cups of sugar. I stirred occassionaly and cooked for another 30-40 minutes until the sauce was thick. 
In the meantime I boiled my mason jars amd lids to sterilize them. Once the pear butter was done I had to taste it, of course, and then put them in the mason jars, and placed them back in the bioling water to seal for about 10 minutes. And there you have it, homemade pear butter. I had some left over and refrigerated it and have been putting it on toast and even cottage cheese. It's so yummy! And works as a great gift. 

Monday, October 21, 2013

Applesauce and Canning


It’s that time of year…Fall! I love it even more now, because of the house we just bought. Chet and I bought our first house in Kalispell and it’s right in downtown and has tons of beautiful orange, yellow and red leaf trees. Another reason I love fall is because apples are ready to be picked. At the families apartment complex are tons of apple trees. We never knew there were fruit trees until two weeks ago, but now that we know it makes the backyard even better. We’ve gone picking several times and have given so many apples away. I made some delicious apple crumble pie, which I’ll have to write a separate blog about. The second thing I made was applesauce and Chet said it’s the best applesauce he’s ever had so I went to pick more. Well I had so much that I thought I might as well do some research online and learn how to can applesauce. So yesterday I peeled and cut all my apples, cooked them with water over the stove, mashed them, and then added some sugar and cinnamon and let it sit in the pan to stay warm. Meanwhile I boiled water and put the mason jars, including the lids, in the boiling water to sterilize them for 10 minutes. I then took them out with tongs and put applesauce in all the mason jars. I left ¼ in. on the top for room. I then sealed them tight and placed them in the boiling water for 20 minutes. Once that step was finished I took them out and pushed down on the top of each jar to make sure it didn’t make that popping sound. None of them did, which means they are canned properly. I enjoyed it so much and still have apples so I bought more mason jars at the grocery store today to do more canning this week. I definitely recommend doing this. It’s fun, very inexpensive and you’ll have applesauce all winter long and they even make good gifts!

Tuesday, September 3, 2013

Summers in Montana


Summers are always packed full, very busy but amazing at the same time.....because family comes! I had my brother, Christain, come for a week and it was awesome. We had so much fun doing all the outdoor activities. Then my dad, em and Lexi came the weekend Christian was here and we hiked, went on the boat at the lake and floated the river. It couldn't have been any better. Well, unless Court was here but she comes in just 8 days and I can't wait.
Then a week in a half later my mom and Ron came for a week and we filled it with tons of fun activities. One of which was finding out the sex of baby Todd and having a revealing dinner party. We went to my 19 week ultrasound appointment and the technician put it an envelope and that night Michelle wrapped the appropiate sex outfit and Chet and I opened the gift box and it was a BOY outfit! We are so happy and thrilled!!

Friday, July 26, 2013

Coconut Curry Chicken

So I repinned a recipe from my sister, on Pinterest, and I made it Monday night. It was amazing! I will totally make it again and I highly recommend it. The best part is its healthy and so easy to make. The only thing I didn't add from the list of ingredients is corn starch, but I did add two things they didn't have listed: bamboo shoots and green beans. The bamboo shoots were from a can and I just drained the water and put them in the last hour of cooking. Then I added the green beans about 45 minutes before it was finished. What I liked abut the recipe is you purée over half the ingredients and it makes a delicious sauce, then you throw everything in the crockpot and let it cook for 6 hours.
I forgot to take a picture of ours but we even had leftovers tonight and it seemed to taste even better!
http://www.sweettreatsmore.com/2012/10/slow-cooker-coconut-curry-chicken/

And here is the recipe from the website:

Slow Cooker Coconut Curry Chicken
Ingredients
2 lb boneless skinless chicken breasts or chicken thighs, cut into cubes
5 large carrots, peeled and diced
1 medium onion, peeled and quartered
2 cloves garlic, peeled
1 large bell pepper, seeded and chopped (I used a green pepper)
1 (5 oz ) can tomato paste
1 (14 oz) can coconut milk
1 1/2 tsp salt
1 tbsp curry powder
1 tbsp garam masala
1 jalapeno, seeded and halved OR 1 tsp crushed red pepper flakes
2 tbsp water
1 1/2 tbsp cornstarch
Instructions
Grease your slow cooker with Pam. Place the chicken and carrots on the bottom of slow cooker.
Place the rest of the ingredients (except water and corn starch) in a food processor and process together until mixture is mostly smooth. ***If your food processor is too small to hold everything, process everything but the coconut milk. Transfer mixture to a medium bowl then mix in the coconut milk.
Pour the sauce over the chicken and carrots, mix well, then cover and cook on low for about 6 hours.
An hour or so before serving, mix cornstarch and water together in a small bowl until cornstarch is dissolved. Pour mixture into the slow cooker, stir to combine, and continue cooking for another hour. **This will thicken up the sauce. When the sauce is to your desired thickness, turn slow cooker to warm setting until ready to serve.
Serve over rice, with Naan, and garnish with cilantro.

Tuesday, July 16, 2013

Zucchini Lasagna

Last night I made zucchini lasagna and it was so good! We had leftovers tonight and I totally recommend it. The great part is there's no noodles so you save a lot of calories by replacing it with zucchini.
Here is the link to the website: http://www.skinnytaste.com/2009/02/zucchini-lasagna.html


And here is the recipe straight from the website:
Zucchini Lasagna
Skinnytaste.com 
Servings: 8 • Serving Size: 1/8 • Old Points: 8 pts • Points+: 9 pts
Calories: 345 • Fat: 17 g • Carbs: 16 g • Fiber: 2 g • Protein: 36 g • Sugar: 8 g
Sodium: 801 (without salt) 

Ingredients:  

  • 1 lb 93% lean beef
  • 3 cloves garlic
  • 1/2 onion
  • 1 tsp olive oil
  • salt and pepper - I used garlic salt
  • 28 oz can crushed tomatoes
  • 2 tbsp chopped fresh basil
  • 3 medium zucchini, sliced 1/8" thick
  • 15 oz part-skim ricotta
  • 16 oz part-skin mozzarella cheese, shredded (Sargento)
  • 1/4 cup Parmigiano Reggiano
  • 1 large egg

Directions:

    In a medium sauce pan, brown meat and season with salt. When cooked drain in colander to remove any fat. Add olive oil to the pan and saute garlic and onions about 2 minutes. Return the meat to the pan, add tomatoes, basil, salt and pepper. Simmeron low for at least 30-40minutes, covered. Do not add extra water, the sauce should be thick.

    Meanwhile, slice zucchini into 1/8" thick slices, add lightly salt and set aside or 10 minutes. Zucchini has a lot of water when cooked, salting it takes out a lot of moisture. After 10 minutes, blot excess moisture with a paper towel.

    On a gas grill or grill pan, grill zucchini on each side, until cooked, about 1-2 minutes per side. Place on paper towels to soak any excess moisture.

    Preheat oven to 350°.

    In a medium bowl mix ricotta cheese, parmesan cheese and egg. Stir well. 


    In a 9x12 casserole spread some sauce on the bottom and layer the zucchini to cover. Then place some of the ricotta cheese mixture, then top with the mozzarella cheese and repeat the process until all your ingredients are used up. Top with sauce and mozzarella and cover with foil.

    Bake 45 minutes covered at 375°, then uncovered 15 minutes. Let stand about 5 - 10 minutes before serving.

    Thursday, July 11, 2013

    Glorious Summer Fruit {and the things you can do with it}

    I don't know about you, but I love fruit and especially during the summer time when the farmers markets are going on, fruit costs less and you can pick your own berries!

    Nick and I went to the Owasso Christmas Tree and Berry Farm two weekends ago to pick scrumptious blueberries and blackberries. Berry picking is a bit dangerous because you just keep picking and picking and picking, then you have to go pay for it and before you know it you are spending $40 on berries (maybe we did that?!?!). They might still have some berries if you head out this weekend, but I would call ahead to be sure. Here is their website : http://www.owassotreefarm.com/blackberry.html

    Here is what we ended up with. A lot, I know. But we have put it all to good use and none of the berries went bad. Woo hoo!

    Here is a list of what I have done with the berries:
    - Froze 2 small bags of blackberries
    - Made 5 jars of blackberry jam
    - Several fruit and yogurt parfaits
    - Banana blueberry pancakes
    - Banana blueberry bread
    - Blackberries on top of ice cream
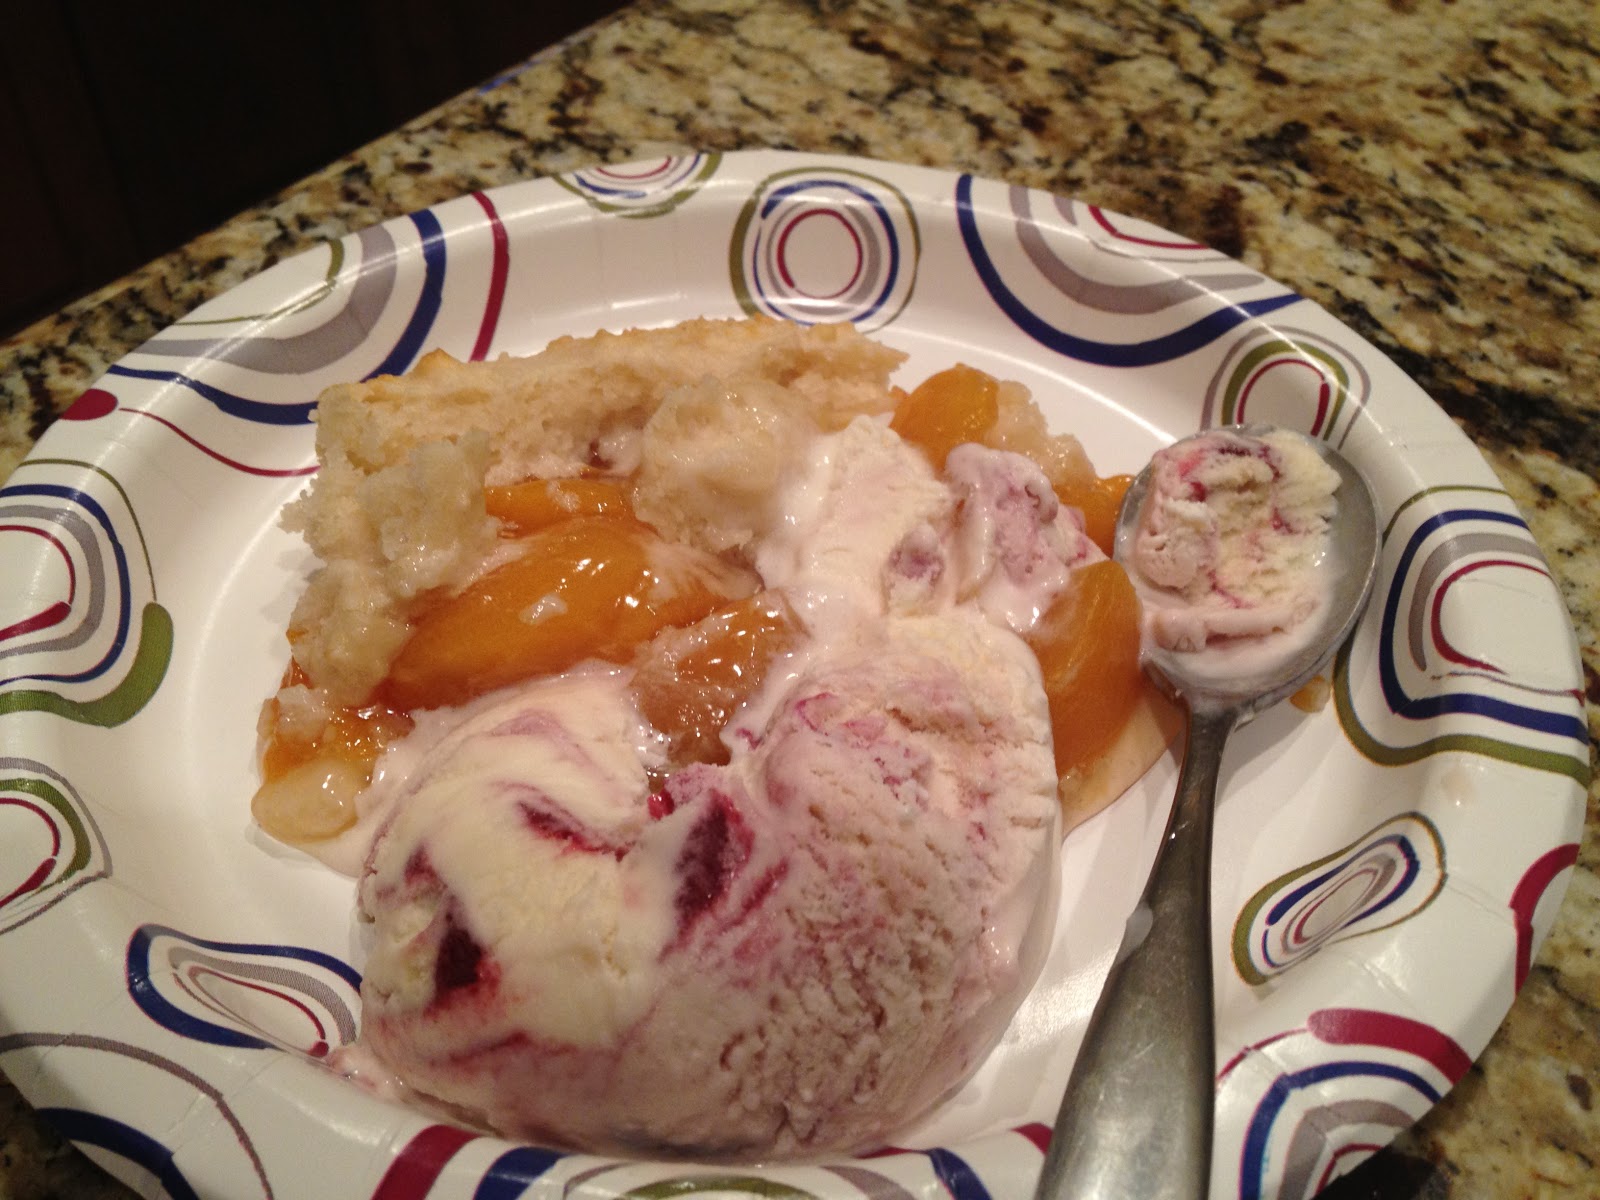
    - Blueberry dumplings (this is a Paula Dean dessert and absolutely amazing, Recipe Here)

    If you are interested in canning and want to try making your own jam, just go for it!! I was very intimated and not quite sure if it would work, but it turned out great. We will have blackberry jam all year, unless we decide to share some.

    Here is the recipe I used to make the jam - Blackberry Jam The only change I would make is less sugar because our blackberries were ripe and super sweet. If you use frozen berries, you might want all the sugar. Next time I will reduce by about 1 to 1.5 cups.

    If you have never canned before, I found this set of directions very helpful. Intro to Canning PDF!

    Here are some of the pictures from my canning experience.

    I hope to can tomatoes this year.

    Lastly, I would like to share my favorite Banana Bread Recipe. It is seriously awesome and I guess it is considered a low-fat recipe, but I would never have guessed it. I had friends over a few weeks ago and realized I was missing an ingredients to make this banana bread, so I tried a different recipe and it was not near as good. Bummer...should have gone to the store. Oh well.


    It is a betty crocker recipe in my good ole cookbook. This recipe book has all sorts of great information for cooking and baking. I use it as a reference tool ALL the time! Here is the recipe.


    Makes 2 Loaves

    Ingredients:
    1 1/4 Cups Sugar
    1/2 cup butter, softened
    2 large eggs
    1 1/2 cups mashed very ripe bananas (3 medium)
    1 tsp vanilla
    dash of cinnamon (this is my addition)
    2 1/2 cups all-purpose flour
    1 tsp baking soda
    1 tsp salt
    1 cup of chopped nuts, if desired (I omitted nuts and added fresh blueberries instead)

    1. Move oven rack to low position so that tops of pans will be in center of oven. Heat oven to 350 degrees. Grease bottoms only of two 8x4 inch pans or one 9x5 loaf pan with shortening or cooking spray. 
    2. In large bowl, stir sugar and butter until well mixed. Stir in eggs until well mixed. Stir in bananas, buttermilk and vanilla; beat with spoon until smooth. Stir in flour, baking soda, cinnamon and salt just until moistened. Stir in nuts or blueberries. Divide batter evenly between 8-inch pans or pour into 9-inch pan. 
    3. Bake 8-inch loaves about 1 hour (I checked mine at 40 minutes and they were done, so start checking early). 9-inch loaf pan could take 15 minutes longer. Check with toothpick to see if it comes out clean. Cool 10 minutes in pans on wire rack. 
    4. Loosen sides of loaves from pans; remove from pans and place top side up on wire rack. Cool completely, about 2 hours, before slicing. Wrap tightly and store at room temperature up to 4 days, or refrigerate up to 10 days. 


    We kept 1 loaf out and froze the 2nd loaf to enjoy later. :)

    Hope you enjoy!
    -Court


    Wednesday, July 10, 2013

    The cure for morning sickness

       Well I wouldn't say a cure but its something that has changed my pregnancy from not throwing up ever day. Every morning before I get out of bed I take one ginger root pill, eat two saltine crackers and then I use two products from Doterra. Doterra is a pure essential oil. Jana, from my small group, sells it and I totally believe in it. So every morning I put the ginger oil behind my ears and the peppermint oil under my nose. So all those things put together has changed my mornings completely. When I started getting morning sickness and throwing up or nauseous I became so worried because my job is to make and serve breakfast to our guests. And at that time the thought of food, the smell of eggs, coffee and pretty much anything in the kitchen made me nauseous and or sick. But once I started my morning routine and used the oils it changed. I now get up every morning feeling tired but good, make and serve breakfast and I'm so blessed for that. If you're interested in the product I can give you Jana's information. Also, I used oregano for my planters wart and now it's completely gone! I also use a blend for my face and it totally helps and I also you a blend for headaches and it works too. So if you're pregnant or tired of using medication try this essential oil. It sure has changed my life. 

    Thursday, July 4, 2013

    Vegetable Garden Part II

    I should have posted this a few weeks ago, but life has been really busy for Nick and I the past month and a half! The garden is doing great. Tomatos are starting to turn red...woohoo!

    Having a garden is amazing! Everyone should do it or at least try.  And you can really do quite a bit with just a little bit of space. There are so many resources out there to help guide you.

    About two months ago I transplanted everything into the garden bed that Nick built. It was both good and bad. We learned that you cannot buy tomato plants and not transplant them three weeks later, you need to do it within a week--oops. Quite a few of the pods where we started seeds did not transplant well...at all...they died. I don't know if I did something wrong or it was the weather, who knows. For some things like green beans and zucchini only a few if the transplants lasted, so i had to plant more. Carrots, zucchini and green pepper did not work at all, so I ended up planting seeds directly in to the ground for those. For some reason the green peppers never grew and I bought a starter plant last weekend. We also bought sweet potato slips and planted those last weekend. The lettuce and spinach were growing great and I got a few cuts off them, but the squash plant has kind of over taken their area, so they are not growing well anymore. 

    So far we have had 1 good size zucchini, a bunch of green beans, lettuce and spinach. Soon we will have lots more zucchini and tomatoes!  The green beans continue to grow and I check them periodically to see which ones are large enough to harvest. 

    It's exciting to see the results from our hard work!

    Nick has been putting mulch on the plants that are bigger and this seems to be helping and keeps the plants moist between watering. Unfortunately we have pesky little bugs trying to eat our plants so we
    are using a pesticide, but I want to look into some natural pesticides that will work. There is also a little birdie that likes our lettuce.


    The garden has truly been rewarding. It is amazing to grow your own food, I feel so productive!

    We have learned a lot from our gardening experience this year and next year will we plan things out differently and plant a lot more.

    Since we are doing to have tons of tomatoes, I am hoping to learn how to can my salsa and can tomatoes. I hope it goes well. 

    Lastly, look how cute Nick and Shiloh are!  Just walking towards the garden. Cute cute cute. 

    -Court


    Monday, June 17, 2013

    We're Expecting...

    So...I'm pregnant! Just saying the word is still a shock. But Chet and I are SO excited and happy. I'm due Janaury 22nd, and I can't wait to be a parent. It's really a dream come true. I'm almost 9 weeks, and baby Todd is the size of a green olive and is 1 in. long. I have a couple apps on my iphone and it's so fascinating reading all the different organs and body parts growing each week. It's truly a miracle.
    Unfortunately I've been getting all the symptoms that come your way in the 1st trimester: nausea, fatigue at times, tiredness (I'm tried all the time but that's usual), body changing, morning sickness and taste buds changing. But I know it will all be so worth it.
    Here's a picture of our little peanut.

    Tuesday, May 28, 2013

    back at it ~ the lake and peach cobbler


    Woo hoo! It's boat time again and I am soo happy! I love spending our weekends on the lake. 
    Memorial Day for our first day out this year and it was wonderful. A little too windy to go out on the main part of the lake, but we hunkered down in a beautiful cove and relaxed with some friends.


    The bad thing was that I thought SPF 15 sunscreen would be enough to keep me protected from the sun's rays on our first trip of the year. Not so much! I even re-applied sunscreen, but I am a bit pink. Ok a lot pink!
    We ended the day with a yummy bbq meal and peach cobbler. 

    Easy Peach Cobbler

    2 - 16 oz ramekins

    1 can - Peach Pie Filling (18 oz can)

    Biscuit topping--
    1 cup flour
    1/4 cup sugar
    1 1/2 tsp baking powder
    1/2 tsp salt
    3 Tbl shortening
    1/2 cup milk

    Wrap a cookie sheet in foil. Split the peach pie filling between the two ramekins. Preheat over to 350 degrees. Mix all dry ingredients together and cut in the shortening with a fork. Keep cutting intul the shortening is in small bits. Add the milk and stir just until the mixture is moist. Use two spoons, drop biscuit  dough balls over the peaches until the top is covered. (This will make extra dough, I made 1 biscuit on its one.) Place ramekins on foiled covered cookie seer and bake at 350 for 22-25 minutes. If you have extra to make a biscuit, it will cook in a lot less time than the cobblers. 


    Serve with ice cream. I had blackberry ice cream with this…super YUM!

    These were yummy and HUGE. I only ate half of mine.  And I forgot to take a picture before we started digging in. I left ours a little doughy, because that is the way my hubs likes it and I like to keep him happy!


    I am still searching for the perfect shortbread cookie type crust for cobblers, but in the mean time, this was great!

    Monday, April 22, 2013

    Vegetable Garden -- Part I

    Well, I do not know what I am doing when it comes to gardening. I did not do much gardening as a kid, so Nick has taught me a lot. First off, Nick was taught by his dad, who is amazing in the garden. His dad recently showed us how their backyard via Skype and it looks like a little Oasis. We are not going for Oasis at this time, we are growing a vegetable garden. Yep...lots of edibles and I am soooo excited.  

    This will be the first of a few posts about our vegetable garden, so I will call this the 'prepping' stage. 

    First, we decided to do a raised garden bed. Nick went to Home Depot and bought three 3x8x12 untreated boards. Had them rip one in half to it made a 4’x8’ bed that was 12” high. Took 15 minutes to build the box with decking screws, then he coated in a Thompson water seal. The box was filled with 1 yard of garden mix from a local nursery. Nick filled up the back of his truck and shoveled it into the box. It cost $30 for the boards, $35 for the soil. Not bad!

    We bought seeds at home depot and we are planting the following: bell peppers, zucchini, green beans, carrots, onion, lettuce, spinach, basil, cilantro, sweet potatoes and tomatoes all in that 1 garden box!!!!  We split box into  1 foot squares and planted the vegetables by the foot. 

    Here are some great tools that Nick found to plan out our garden. 

    Here’s planting schedules for our zone, you can find others on this website too:
    http://www.thevegetablegarden.info/resources/planting-schedules/zones-5-6-planting-schedule

    Here’s the garden plotter site where you can put in your garden size and it will tell you how many to plant in each location. Pay attention to the planting instructions and “learn more” at the bottom -  some really good info:
    http://www.gardeners.com/on/demandware.store/Sites-Gardeners-Site/default/Page-KGPJS

    Here’s a soil volume calculator if you’re doing raised beds:
    http://www.gardeners.com/Soil-Calculator/7558,default,pg.html

    So once we figured out what could be planted in the ground and what needed to stay inside until the chance of freeze was gone, we started. Here are our seedlings growing and tomato plants in the garage. 


    We also built a gate so that we can get in and out of our garden and so it is protected from little pesky animals, like our dogs and rabbits. 

    So Nick built the gate and then I made it pretty. We used our projector upstairs to project the design that I made onto the gate and we traced it with pencil. Then I took it into the garage and started painting. I am pretty happy with the way it turned out. 


    The next post will have everything planted and our fence around the garden. I hope we have lots to eat this summer. 

    Lastly, I am ending with a picture of Shiloh. She is getting so big, almost 50 pounds. Yikes!!

    Hope this inspires you to get out there and garden!!!
    - Court - 


    Tuesday, March 26, 2013

    Healthy Eating

    It's time to start getting ready for summer, which means clean eating (but summer shouldn't be my excuse). We've been drinking lots of healthy smoothies. The one in this picture was our breakfast green smoothie. I don't measure because we'll end up drinking the entire thing at some point so nothing gets waisted.
    Green Smoothie Recipe:
    Almond milk, or you can use soy milk
    plain greek yogurt
    banana
    1/2 mango
    pineapple
    flaxseed
    cinnamon
    pears
    spinach, tons of it

    - all my fruit, except for the banana was frozen so I didn't have to add ice. If you're fruit is fresh add ice. The yogurt makes it creamy and gives you more protein. Whenever we have fruit that is going bad we cut it up and freeze it, which is great to have for smoothies. Some other things I'll add to the smoothy is carrots, blueberries, strawberries, grapes, cantaloupe or any other berries. I will occasionally replace the spinach with kale. It does give a different texture but kale is very healthy.

    Veggie Stir Fry Recipe:
    garlic
    onions
    bell peppers
    asparagus
    jalapeno's
    cilantro
    kale
    purple cabbage
    a little teriyaki sauce
    garlic salt and pepper
    a little siracha on the top for a spicy kick

    Saute' it all together and enjoy! So yummy and healthy.


    Thursday, March 21, 2013

    Chicken Tamale Casserole - LEGIT!!


    Okay, I made myself laugh by calling this recipe legit, but it was sooooo good! A lot of times new recipes do not turn out as good as I hoped, but Nick went back for a full serving of seconds, so I would say that this new recipe is a winner! The picture does not do the meal justice...

    I love Mexican food. Its probably my favorite, so I like having recipes like this that have a Mexican flair. Yum. I found the original recipe on cooking light and you can find it here. I made adjustments to the recipe which are reflected in my description below.

    Yields 8 Servings

    Ingredients:
    • 1 cup (4 ounces) preshredded 4-cheese Mexican blend cheese, divided
    • 1/3 cup fat-free milk
    • 1/4 cup egg whites
    • 1 teaspoon ground cumin
    • 1/8 teaspoon ground red pepper
    • 1 (14 3/4-ounce) can cream-style corn
    • 1 (8.5-ounce) box corn muffin mix (such as Jiffy)
    • 1 (4-ounce) can chopped green chiles, drained
    • Cooking spray
    • 1 (10-ounce) can red enchilada sauce (such as Old El Paso)
    • 2 cups shredded cooked chicken breast (If you don't have it cooked yet, I wrote easy directions below.)
    • 1/2 cup fat-free sour cream 
    1. Preheat oven to 400°.
    2. If you do not have cooked chicken, you can easily make cooked shredded chicken in about 20 minutes. Put four or so chicken breasts in a pot of water with seasoning (I used cumin, paprika, chili powder, cumin, garlic, salt and pepper) bring to a boil, then turn down to simmer for 15 minutes.  Shred with 2 forks.
    3. Combine 1/4 cup cheese and next 7 ingredients (through chiles) in a large bowl, stirring just until moist. Pour mixture into a 13 x 9–inch baking dish coated with cooking spray.
    4. Bake at 400° for 15 minutes or until set. Pierce entire surface liberally with a fork; pour enchilada sauce over top. Top with chicken and add more seasonings of choice if desired, then sprinkle with remaining 3/4 cup cheese. Bake at 400° for 15 minutes or until cheese melts. Remove from oven; let stand 5 minutes. Cut into 8 pieces; top each serving with 1 tablespoon sour cream.

    And then enjoy this scrumptious meal. Serves 8.

    Here is the nutritional information for 1/8th of the pan which is filling!
    • Calories: 354
    • Calories from fat: 36%
    • Fat: 14.1g
    • Saturated fat: 7.1g
    • Monounsaturated fat: 3.3g
    • Polyunsaturated fat: 1.2g
    • Protein: 18.9g
    • Carbohydrate: 36.3g
    • Fiber: 2.5g 
    • 9 Weight Watchers Points 
     Let me know if you try this!

    ~Court

    Monday, March 11, 2013

    Cooking with Cast Iron


    I got my husband to write a blog about cooking with cast iron. We love cooking with cast iron and you should try it. 

    Over the last few years Court and I have tried very hard to simplify our cooking and eating habits. While we’re not perfect, we check labels incessantly and research like crazy, doing the best we can to limit our intake of processed foods and chemicals. There is something incredibly unnatural however that many people use on a weekly basis and don’t even realize it – we didn’t for the longest time. When we got married we were given an incredibly nice set of Calphalon pans. They we’re heavy and cooked wonderfully. Over the last few years however, we noticed that continuous use has begun to scrape the Teflon off of them. Being the research nut I am, I looked into what Teflon can do when it leeches into your food – holy cow!!! How in the world did we ever let this stuff touch our food! Many people believe Teflon can cause cancer, tumors, headaches, etc. Why take the chance? 

    After reading up I headed into the garage, cracked open my old camping gear and dug out my cast iron skillet. It had never been used for anything but cooking over a campfire and had never been properly seasoned, but I figured anything was better than letting flakes of baked chemical leach into our food. I then began the long process of learning how to properly use cast iron, and since then we’ve fallen in love with it. It’s not difficult, but like many things, if you don’t follow the process, you’ll be sorely disappointed. The benefits are simple: They cost 10% of what an over-priced, foreign-made pan does and will last 5 lifetimes. They give you your daily requirement of iron (really!), take almost no time to clean, and cook more evenly than a $400 pan ever could. Cast iron has literally changed the way we cook!

    Choosing Cast Iron
    There are many types of cast iron, and all are not created equal, but just about all will work. If you feel like investing the time into getting something classy and quality, head down to your local antique mall or thrift store. You are looking for a skillet made by Griswold or Wagner. The brand is on the bottom. Other brands are good – these are great. You’ll want a size somewhere between 8 and 12 inches depending on your cooking habits. You’ll most likely walk away spending $30 on something gross and covered in rust. Good – you’re making progress. The old seasoning on it won’t do you any good, so be prepared to destroy it. It’s ok, you’ll make it better. Get the pan wet and with heavy duty sandpaper, get to work. You’re trying to get the surface on the outside and inside smooth. Sometimes I take a metal brush on my drill and lay into it as well. If you can get it down to the silver color, you’re doing great. You literally can’t destroy it, so give yourself a workout. The main thing is, get as much gunk off as you can. You want it smooth – the oven will do the rest. Rinse it well with hot soapy water and dry it completely. Then toss it in the oven on a low 2 hour cleaning cycle. This should loosen the rest up and turn it to ash. You’re halfway there now. Once it’s cooled (it can take 4-6 hours!), take it out, rinse it again with hot soapy water (this will be the last time soap touches your pan so enjoy it) and dry it thoroughly. Water causes rust. Rust is bad. Savvy? 

    If you don’t want to go thru the trouble of investing in a quality older pan, you can head down to Walmart and pick-up a Lodge skillet. Lodge and similar brands are cast, not milled, so they will have a rougher surface. Milling grinds the metal down to a smooth surface, casting basically fills a mold with iron. Despite the name, old cast iron is milled, new cast iron is casted. With proper and continuous seasoning it won’t matter, but it does take more work to get newer ones cooking like the older ones. 

    Seasoning
    Seasoning your pan is the most important step. Without it, you’ll attempt to fry your first egg and end up in the corner in a fetal position crying. Trust me, it’s not fun for you, the pan or the egg. Seasoning creates the natural “Teflon” that allows you to slide an egg around a hot pan without anything oil and without sticking. A properly seasoned pan works 10:1 better than Teflon and probably won’t kill you in the long run. I consider this a plus.
    Grab a tub of Crisco or generic shortening (lard works too). I know it’s unhealthy, but you’re not making a PB&J with it, so you’ll get over it. Cover a large cookie sheet in foil, set your pan on it and put on a rubber glove – it’s about to get messy. You’ll now proceed to grab a handful of shortening and rub the entire pan – EVERYTHING… inside, outside, handle and all - down with shortening. You want a nice white coat covering every inch. Wipe down the build-ups, but make sure it’s coated like you’re buttering bread. Once you do, set your pan upside down on the cookie sheet and place it in the oven on 340 degrees for 2.5 hours. Once the timer goes off, turn off the oven and let it cool with the pan inside. Once it cool, take the pan out, lightly wipe down with a paper towel to clean up excess shortening that hasn’t hardened, then do the whole process over again – shortening, glove, the whole bit. Put it back in for the same amount of time. By the time you do this twice, you’ll have a nice seasoning layer that is beginning to build up. You’ll notice your pan has changed from silver/grey to black/brown. That’s good. As you continue to cook on it more seasoning will build up, making that surface slicker and slicker. Years of seasoning is what gives cast iron it’s reputation. This is why grandma’s cast iron is so valuable. When properly maintained, a cast iron skillet can last 100+ years and never require re-seasoning. If you do notice the seasoning starting to fade, use the Crisco trick. And if you REALLY need to start from scratch, pop it in on another cleaning cycle and lather, rinse, repeat. 


    Care and Daily Use
    This is the easiest part, but goes against everything you’ve ever learned. Repeat after me – I WILL NEVER, EVER WASH MY CAST IRON WITH SOAP NOR WILL I SCRUB IT WITH A SPONGE. One more time. Seriously. Please promise me this. Doing so will DESTROY your seasoning and make you and me cry. Your cleaning tools will consist of water, a good metal spatula (which works great for cooking with too – I recommend a Dexter), and a paper towel.
    Once you use your properly seasoned cast iron to make the best darn eggs of your life (or vegetables, meats, beans, cornbread, etc.) your cleaning habit is simple. Wipe it out with a damp rag. That’s it. For the tough messes, scrape with a metal spatula (firm but not hard enough to eat into your seasoning), rinse with nothing but water and then wipe out. For the impossible messes, fill it 60% with water and boil for 20 minutes. Then pour out and wipe out. They clean easiest when they’re still warm. Lastly – and do this every time – once it’s clean, pour a quarter sized drop of olive oil in the pan and use a paper towel to coat the pan with said oil. This will keep the seasoning from drying. That’s it. No chemicals, no scrubbing, no dishwasher. Just a good old-fashioned wipe down.

    I’m sure Courtney will cover cast iron cooking techniques and recipes later on down the line, but she figured since I do all the pan-prep I might want to chime in a bit. Enjoy prepping and using a pan that you will most likely hand down to your kids and grandkids.

    -Nick